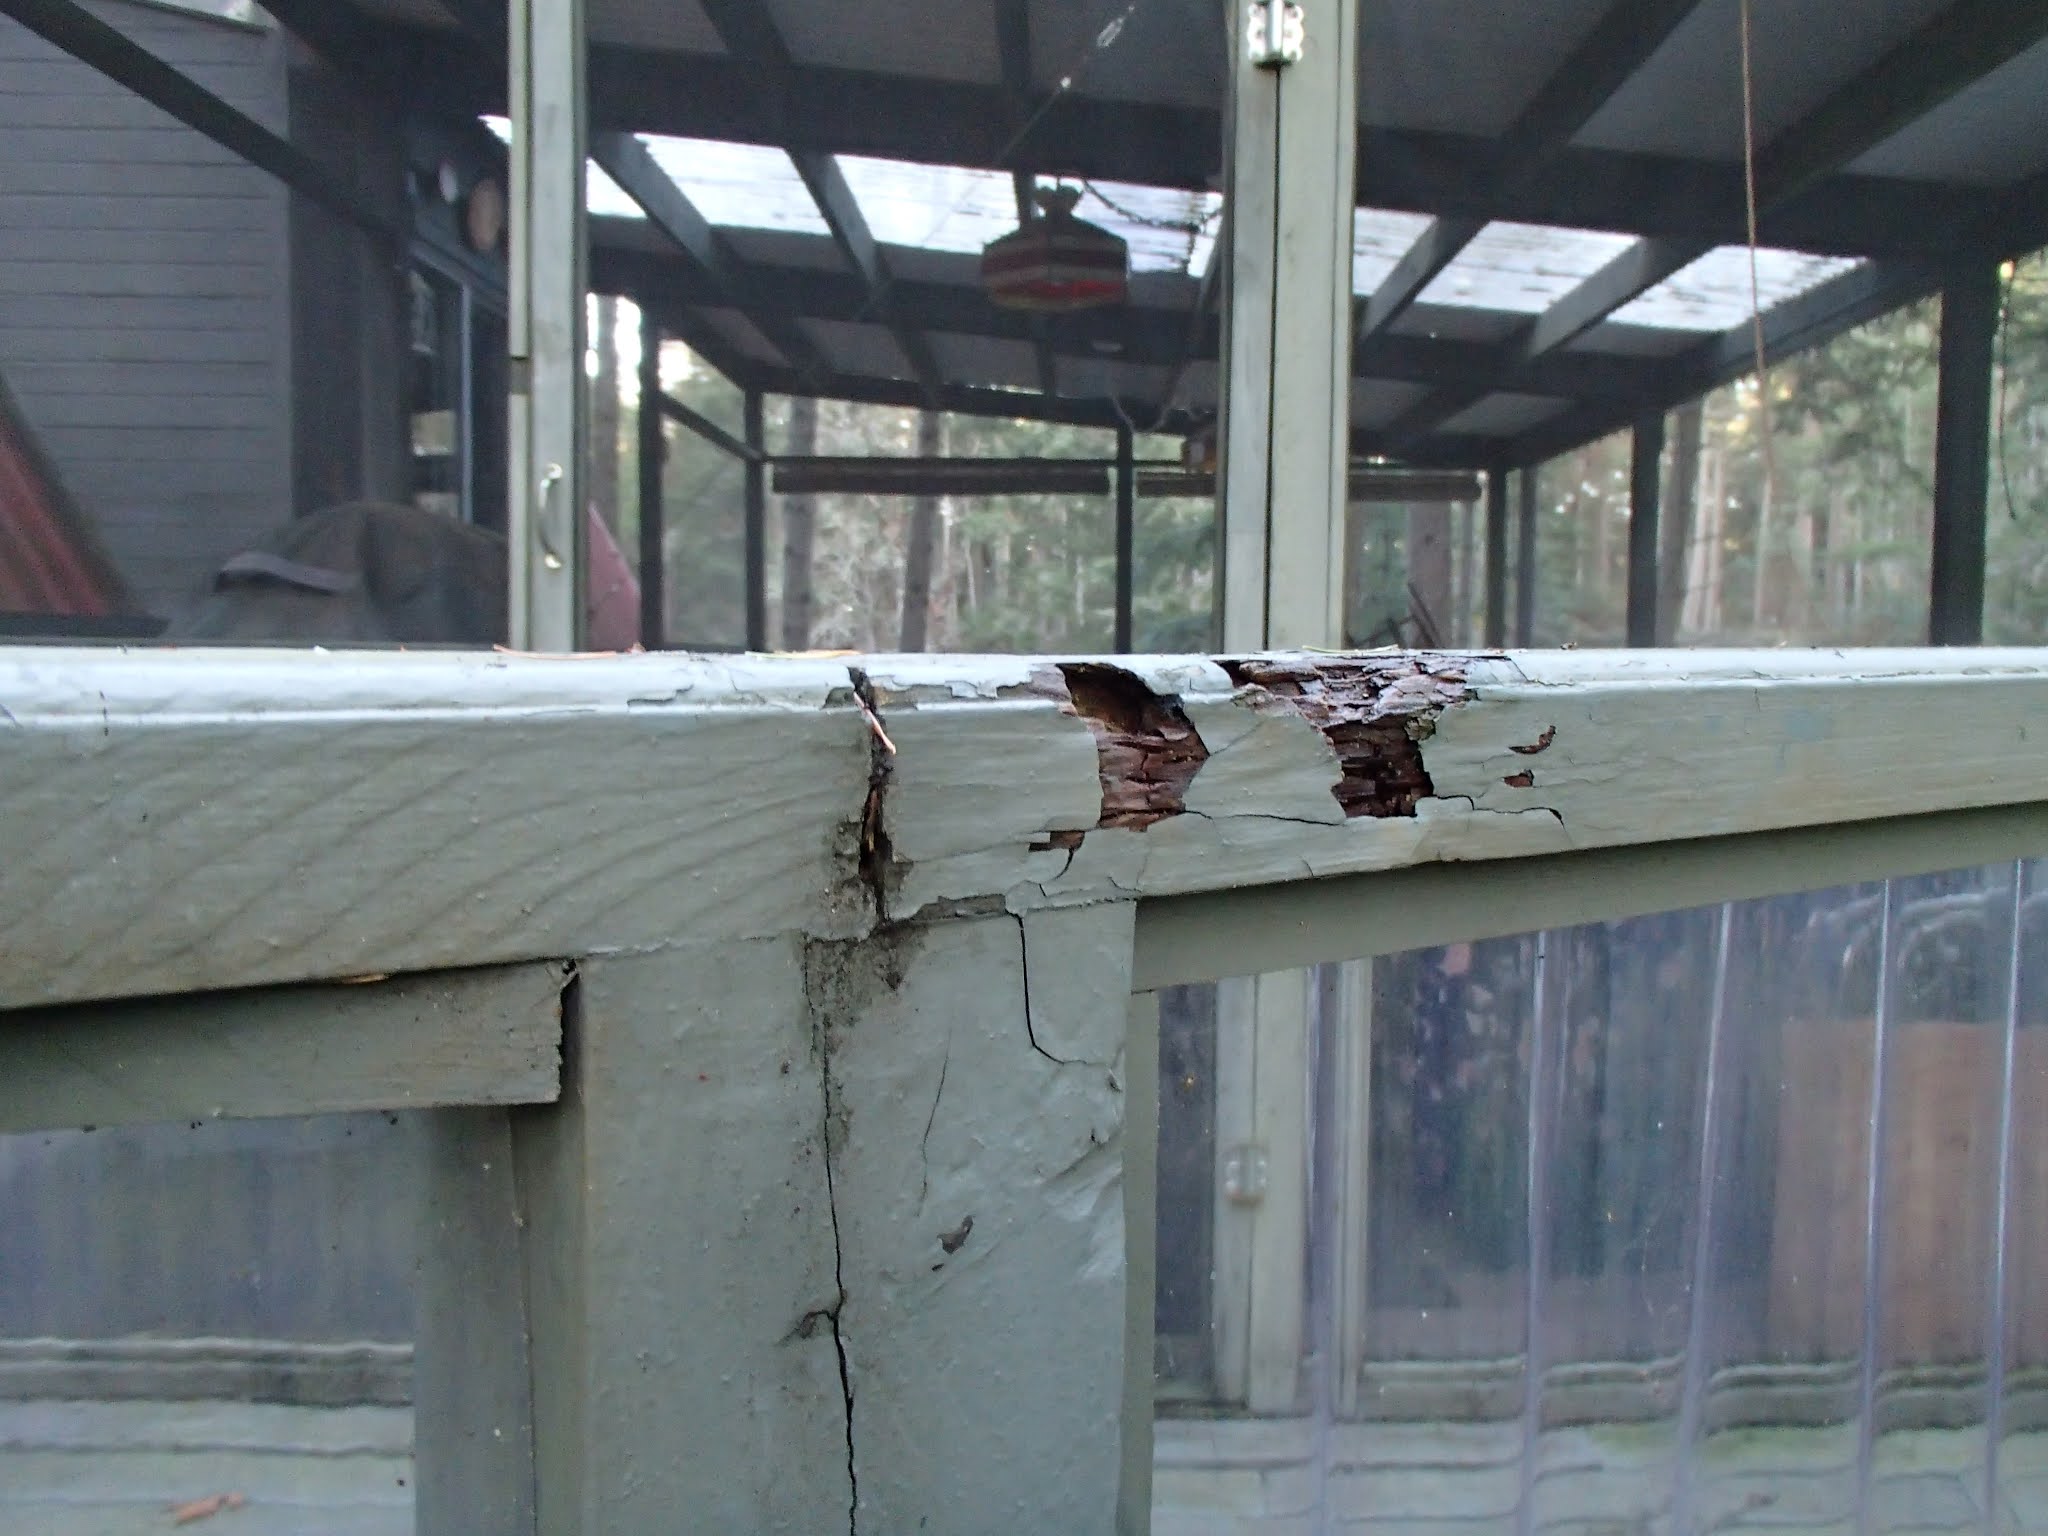
The deck at the De Courcy island cottage consists of two parts - a large covered screened in porch area and a mostly exposed outer deck. The outer deck was a bit of a safety concern when we bought the place because the previous owner had replaced some rotting boards but not addressed the substructure issues, which included rotting joists and supporting posts and beams. Other deck boards were also rotted and the railings were in rough shape. In other words, the whole shebang needed re-doing except for some of the areas under a covered side porch.
 |
| Extensive rot in the railings |
 |
| Deck partially deconstructed. Note the anorexic jury-rigged post that was holding up the outer end! |
Working on a cottage on an island with no ferry service meant that it took two trips on the sailboat to bring out the wood needed for the repair work. One trip was done with a load on deck of the new pressure treated wood for the substructure.
 |
| Swamp Angel in delivery mode. Thanks to Nick Pegg for the photo. |
Another trip was needed to bring out the custom milled cedar for the decking boards.
As you can see from one of the pictures above, the old deck had an angled area and no way to get onto it from the driveway without walking to the opposite end of the house first. Rani and I both found that irksome, in particular with a screen door to the porch that could provide good access to the house from the driveway. We decided to shorten the deck slightly to allow for a set of stairs on the opposite end from the existing ones.
As luck would have it, our generous fellow islanders, Murray and Jan were giving away the metal stringers for an old set of stairs that turned out to be exactly the right height for our purpose. We wire wheeled them to remove rust and repainted with TremClad metal paint.
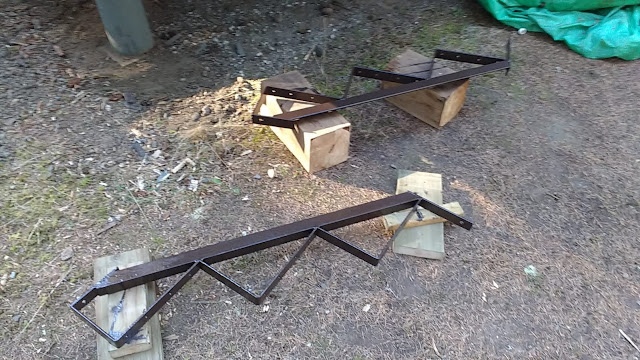 |
| Metal stringers kindly donated by our new friends Murray and Jan |
The first step was to remove the old deck and figure out what to do with the interface between the screened porch part of the structure and the outside deck. There was some rot in the ledger board at one end of the porch where it attaches to the house and the entire ledger board assembly (3 boards thick in total) that attached the outer deck to the porch was rotted through as were underlying beams.
 |
| Deck has been ripped off and turned into firewood sized pieces. |
After the deck was torn off, we cut back the beams to mostly good wood and sister'd in new pressure treated wood beams to support a new deck ledger. Because the deck boards in the screen porch were a bit soft at the ends, we added a pressure treated 2 X 4 all along them as a backing piece for the new ledger board. In an ideal world it would have been nice to tear down the screen porch as well and rebuild everything, but we will save this for another day...
 |
| Apologies for the fuzzy picture. This shows how the deck wood had rotted even under the propane locker (top center of the picture) as well as how the deck ledger is in turn attached to a new side ledger near the gutter drain pipe. |
Once the ledger was up, the next step was to rebuild the outer longitudinal beam that was completely rotted where it had not been covered by a roof, allowing the deck to subside at the outside end. The short posts under this beam were also replaced and the beam was sister'd into the good part of the beam using cheek blocks.
 |
| Taken from inside the screen porch, this picture shows the new outer beam and the joists and outer rim joist in place. |
Once the beam was in place, we spaced out the joists on their original 16 inch centers using joist hangers to attach them to the ledger board on one end and 4 inch screws to attach them to the rim joist on the outside.
 |
| Completed substructure including pressure treated railings and posts |
We also replaced the railings with identical structure except for a new 6 inch top rail in place of the 4 inch original, with the thought that this would help keep water out of the posts. I usually fasten posts to the inside or outside of the rim joist using lag screws or bolts. This time, we needed to align the new posts with those that were left in place supporting the porch roof. To make this work, we had to cut a rebate in the bottom of each post so that they overlapped the rim joist, sitting on top of it as well as lying beside it. We then fastened these using Torx headed 'structural screws' and construction adhesive (PL-Pro). I was extremely impressed with how this combination created a rock solid railing - definitely superior to previous railings that used far beefier fasteners.
The next step was to order and deliver to the island a load of cedar decking as well as some wider cedar planks to replace siding on the propane locker, gas shed, and well box. The deck boards were a funny size - a full 1.25 inches thick by 4 inches wide. These boards were turned out by a local 2 man band saw mill operating in Crofton. Once on the island, we allowed them to air dry on edge for a month before staining them on three sides with some oil based stain we found in the tool shed.
 |
| Installing new boards, working out from the house side of the deck. The boards have been pre-stained on three sides to help with uneven shrinkage and increase longevity. |
Before doing the decking, we tore off some more boards at the other end of the deck where the rain had rotted them over the years. We then calculated a pattern for the new boards where we would stagger the joints and doubled up the joists at these locations. Doing this allows the deck boards to rest more firmly at their ends and helps avoid splitting. We screwed the boards down with 3 inch deck screws, pre-drilling near the ends. The boards were not all that straight but were fairly easy to lever into place using plywood shims as spacers to keep the gaps constant.
 |
| Decking mostly complete |
The final step was to treat the ends with preservative and to paint the decking boards.
 |
Deck completed
|
 |
| End on view - note we still need to add lattice infill to hide the underside of the deck |